Renovating your home? Why not make it a family affair, getting the kids involved in projects that can make them feel included and proud of their work.
Not every job is gong to be right for your kids.
But there are several tasks they can do with supervision, and a few they might be able to handle on their own, depending on their age and maturity level.
The first step is to properly explain the tasks at hand and identify any risks.
"Parents really need to talk to their kids who are old enough to understand and lay down ground rules for the renovation," says Eric Phillips, vice president and general manager at DreamMaker Bath and Kitchen of the Triangle in Apex, NC on Bob Vila.
"And once the rules are there, parents really have to have the discipline to enforce those rules with their kids."
Feeling good about their ability to help? Go renovate something together!
Cleaning and chucking
Before any renovation can start, you'll probably have some cleaning out to do. The traditional three-pile method of "keep, sell, donate" can work well for kids. Telling them they can keep whatever they make on the sale of their old things usually inspires a job well done.
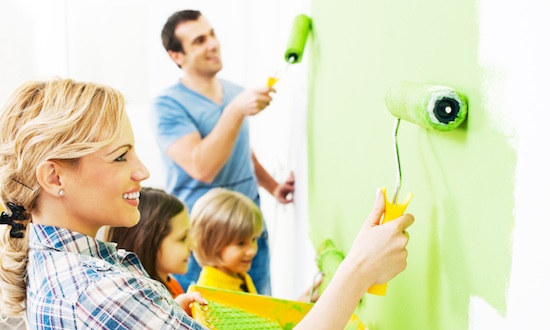
Painting the walls
Your kids have probably been painting since before they could speak. With their fingers, anyway. They probably haven't lost the love of covering surfaces in pretty colors, so set them up with a paintbrush and let them go! You'll want to give them a basic tutorial that illustrates how to best get paint on the desired surface without dribbles. And don't forget to prepare the area with heavy-duty dropcloths, tape up baseboards, and move furniture and furnishings out of the way so they don't accidentally get splattered.

teal & lime
Sanding
Use caution with electric sanders, or any power tool for that matter, when your kids are involved. But sandpaper or sanding sticks and a surface that needs to be stripped down could be a good way to bring some kids in on a renovation. You'll need to make sure they have a dust mask, eye protection, and a well-ventilated area. Sandpaper in tender hands might cause abrasions, so make sure there are gloves as well.
Creating new art
You probably already have a stack of your kids' art showcased or stashed in your home. But directing them to create something new specifically for a showcase wall or tabletop is a great way to involve them in your renovation without worrying about them getting hurt. Choosing colors and materials together at an art store and show them ahead of time where their art is going to be displayed can get them excited about this new project—and maybe make them feel better about the fact that they don't get to handle the nail gun.
Backsplash
Doing your own kitchen backsplash is a relatively easy DIY project you can do over the weekend and have a little fun at the same time. If you're doing mosaics on a sheet, kids as young as five or six should be able to help place them and even help adhere them to the wall and apply/clean up the grout.
Pulling up carpet
Kids who love to dismantle stuff (read: all kids) will love being able to help roll up carpet for removal. The box knife needed to slice it up is probably not the best tool to put in a kid's hands, but taking up the tack strip? A handy child can use a pry bar and rubber mallet to handle this task. Just take proper precautions with gloves, eye protectors and the like. Those nails can be nasty.

Chasa
Laying wood floors
Kids can be helpful gluing and placing wood planks and might even enjoy the process. Can you leave your five-year-old alone to handle the job? Probably not. But working side-by-side with your children laying out the wood pieces will make you all feel good every time you take a step.
Wallpaper removal
The tedious peeling away of old wallpaper might be the perfect task for your kids. Even if they don't finish the job, any wallpaper you don't have to peel off yourself is a bonus. Trust us.
Other demolition
An invitation to break stuff? Oh yeah! Just remember to take all safety precautions (goggles, closed-toe shoes, and gloves if needed) and make sure the demo is appropriate for the age group (i.e. you might not want to leave your five-year-old alone with a power saw.).
Gardening
If your renovation includes an outdoor element, you're in luck! Kids love to get dirty. Depending on the age and inclination of your child(ren), a bag of soil and a shovel might be considered a good time!
Shared from: http://realtytimes.com/consumeradvice/homeownersadvice1/item/38100-20150907-renovating-with-your-kids-projects-you-can-do-together